Schedule Workers
Dec 12, 2024
The UpRate scheduler is a visual, week-to-week planner that can be used to manage your workforce. When you click "Workforce Manager" in the sidebar you will automatically be taken to the scheduler. From here you can add, edit, remove and schedule your workers.
The video and instructions below explain how to use the scheduler. The video also covers how you can automatically collect timesheets from workers on the scheduler, this is covered in more detail on the Collect Timesheets guide. If you'd like a live demo or want access to the workforce manager, book a demo or email help@uprate.digital.
Manage Workers
The first thing to do when you start using the scheduler is to add your workers. Once a worker is added, you can edit their details or remove them at any time.
To add a worker to the scheduler:
Open the scheduler and click the "Add Worker" button
Add your worker's name and, if you know it, their phone number
Click the "Add" button

To add a phone number for a worker after they've been added:
Open the scheduler and click the "Add Number" button (shown under the worker's name)
Add the worker's phone number
Click the "Save" button

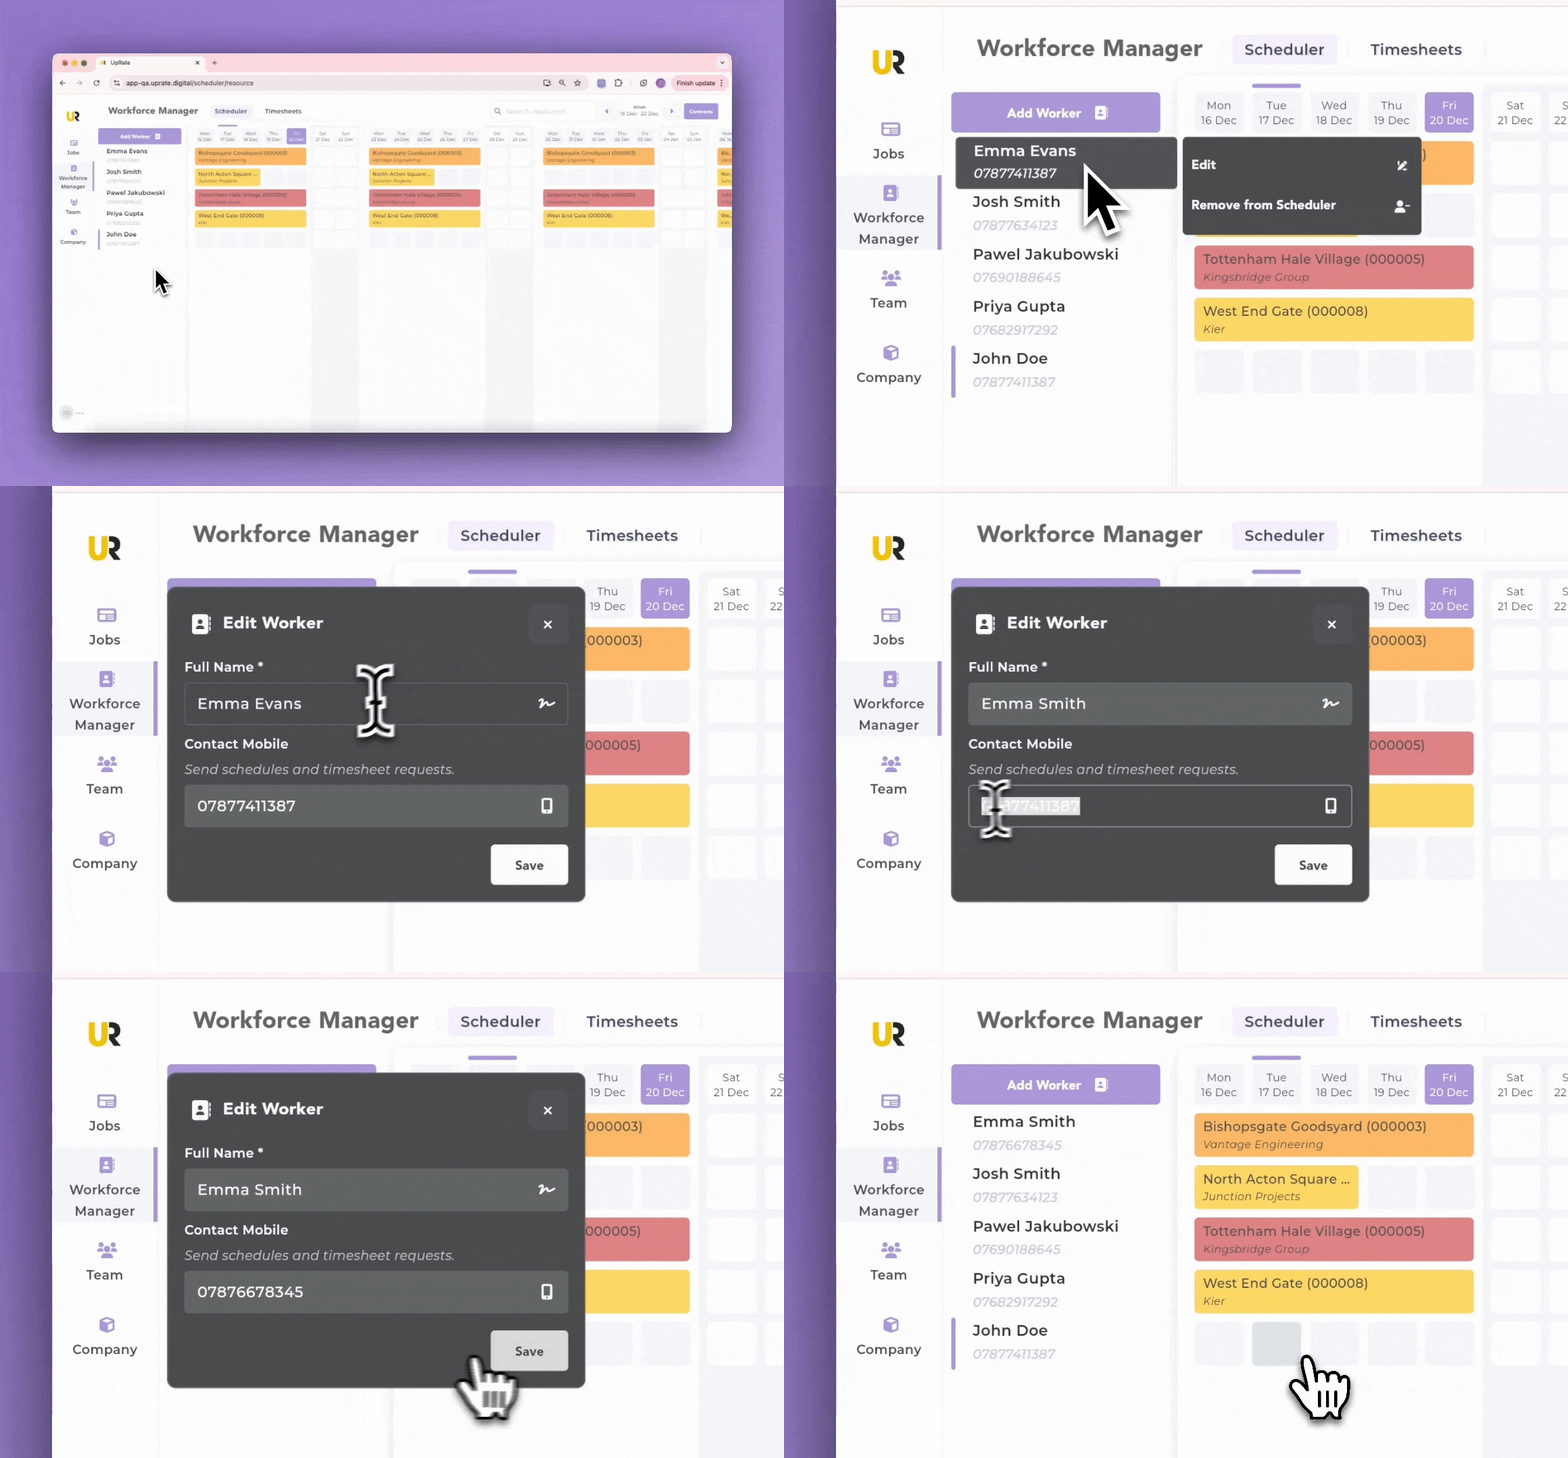
To edit a worker's details:
Open the scheduler and right-click the worker's name
Select "Edit"
Edit the worker's name and/or phone number as required
Click the "Save" button
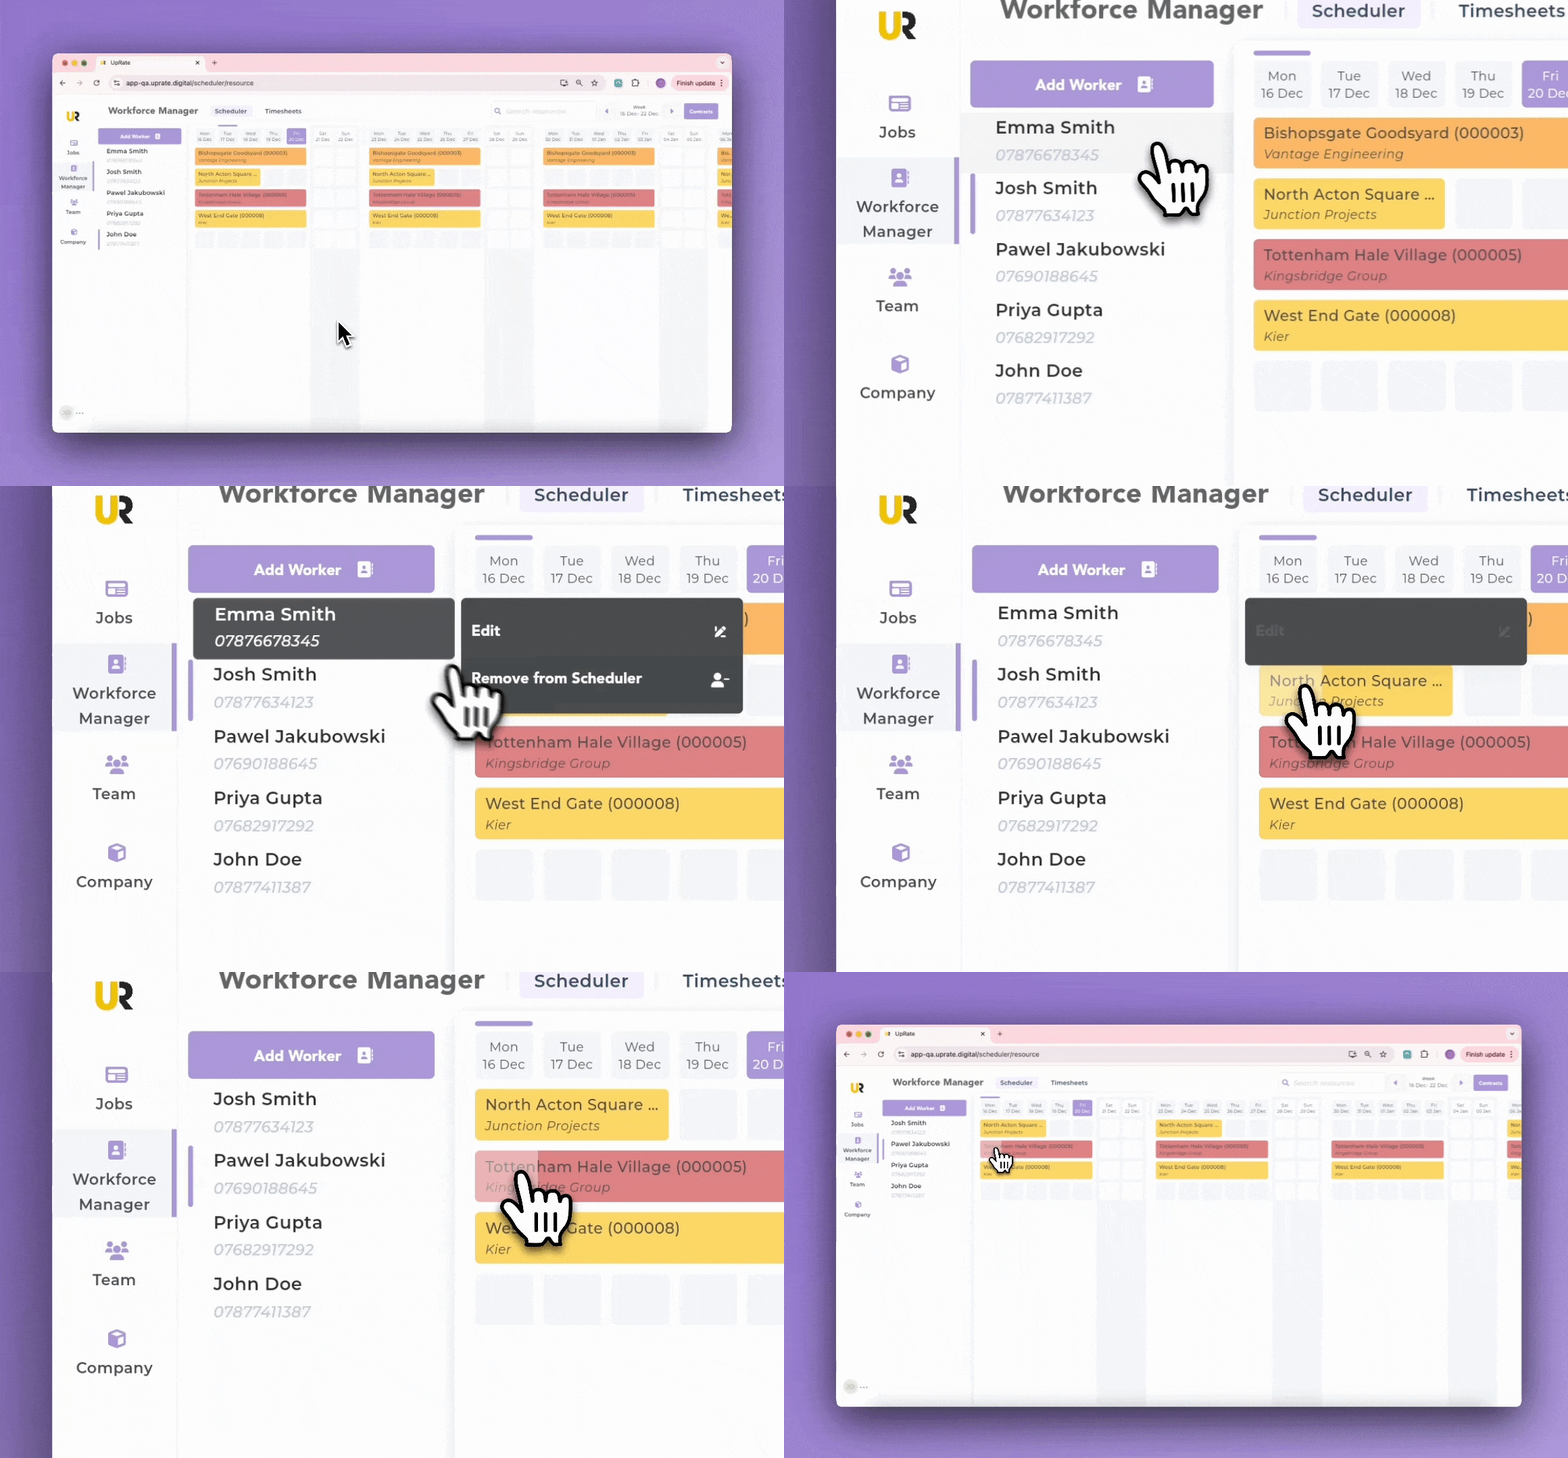
To remove a worker from the scheduler:
Open the scheduler and right-click the worker's name
Select "Remove from Scheduler"
I removed a worker, can I add them back again?
At the moment you can't, but we can do this for you if you email help@uprate.digital.
Manage Customers & Contracts
After adding your workers to the scheduler, you'll want to set up your contracts. These represent the contracts that you have with your customers and that you want to schedule workers onto.
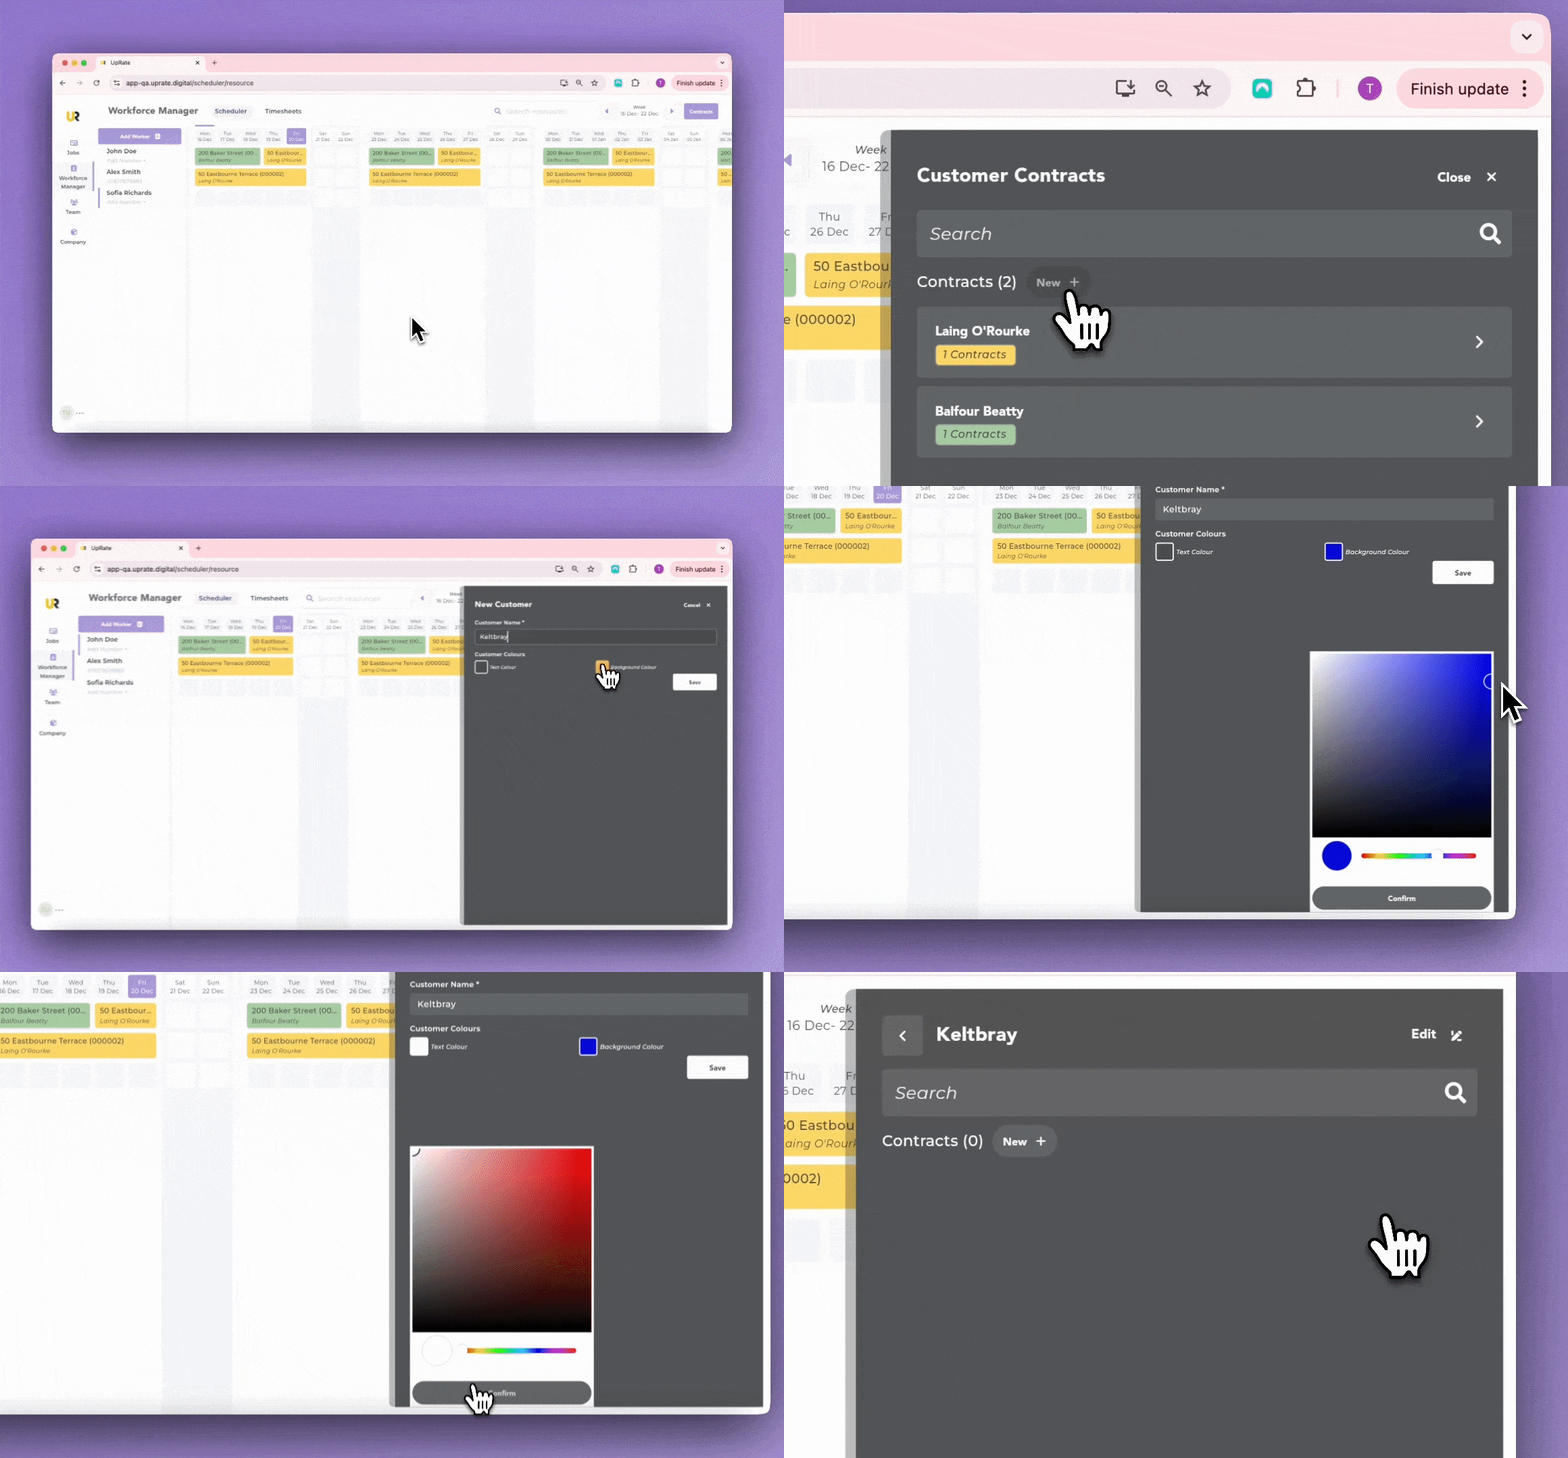
To create a new customer:
Open the scheduler and click the "Contracts" button
Click the "New" button at the top of the list of customers
Enter the customer name and, if you want, change the customer colours to match the customer's branding
Click the "Save" button
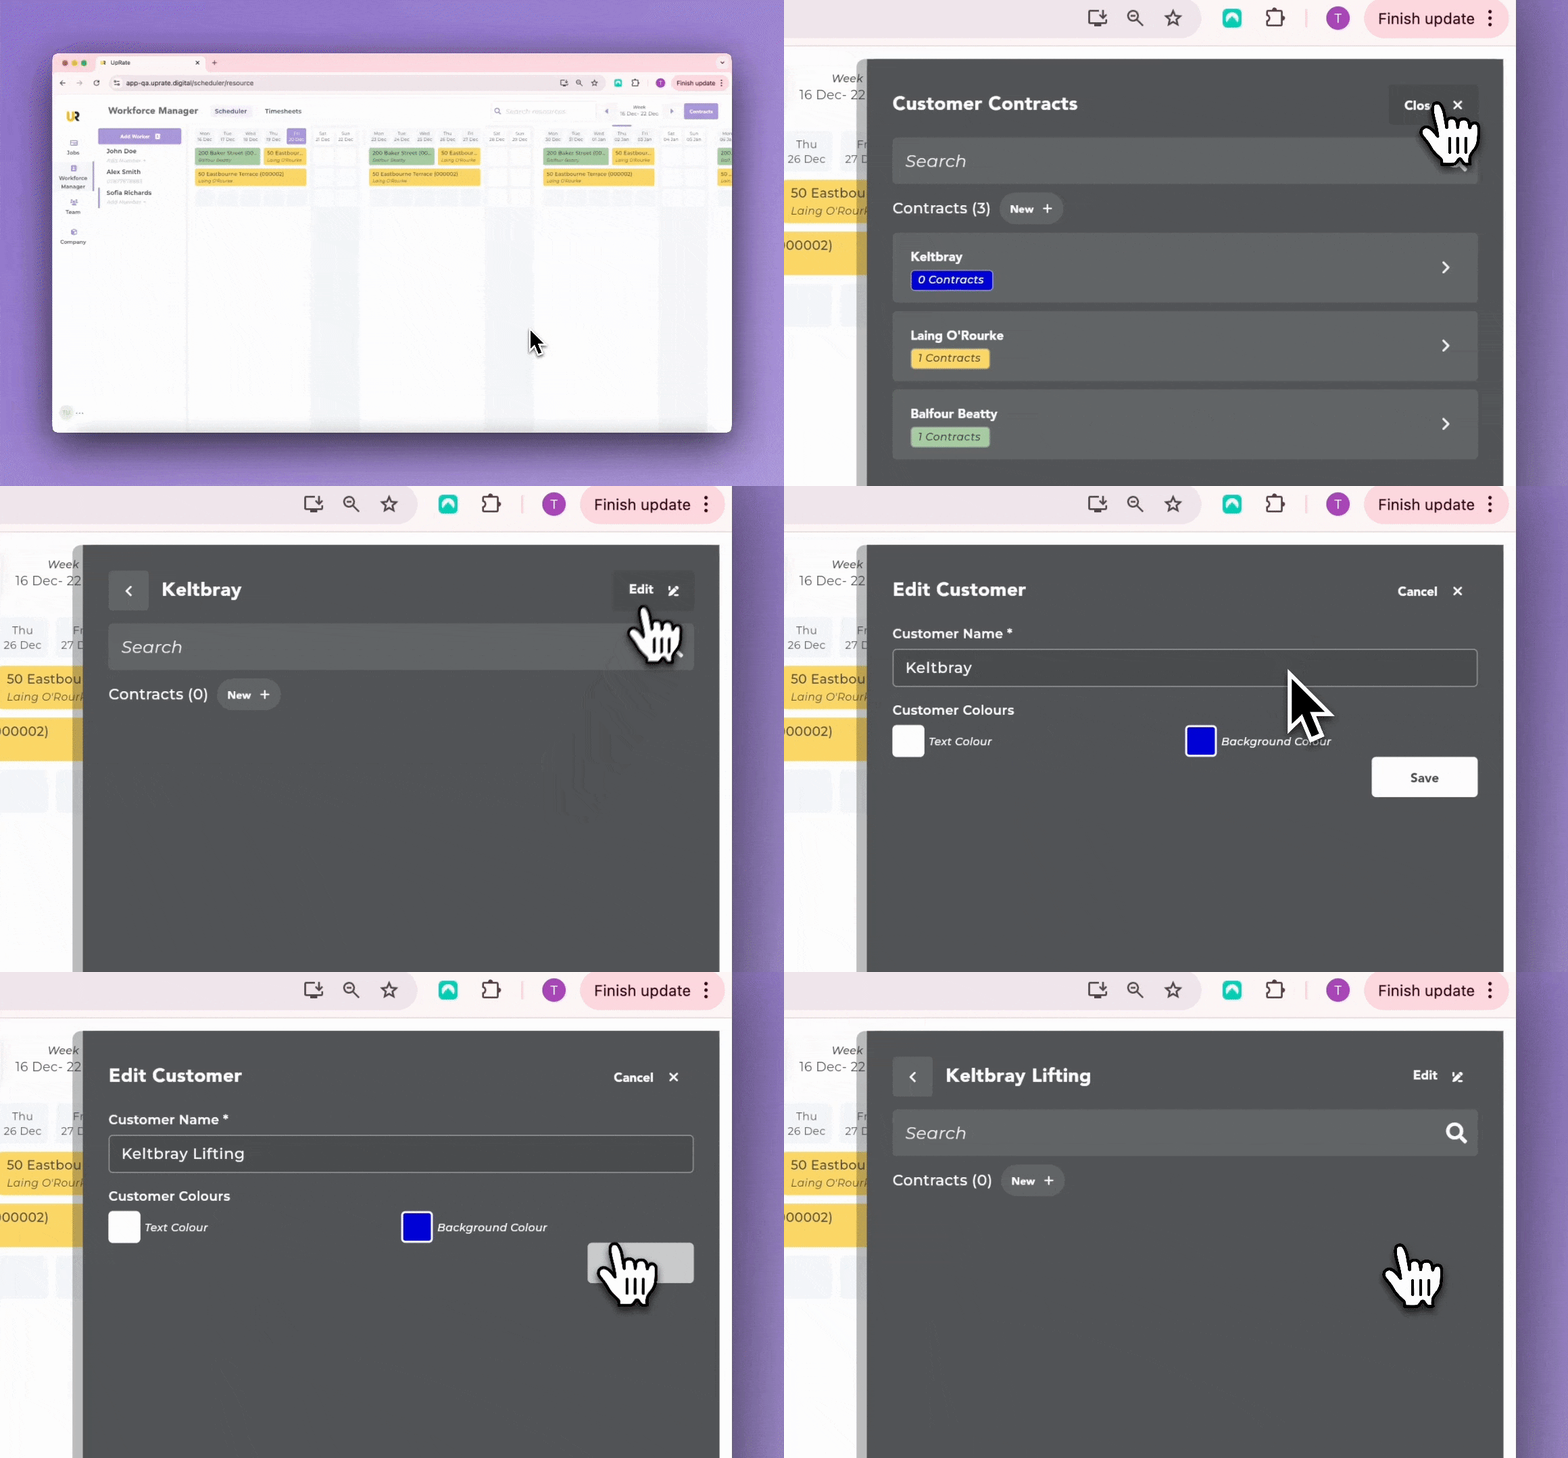
To edit a customer:
Open the scheduler and click the "Contracts" button
Click on the customer that you want to edit
Click the "Edit" button in the top right-hand corner of the page
Change the customer name and/or customer colours as required
Click the "Save" button
Can I delete or archive a customer?
At the moment you can't, but we can do this for you if you email help@uprate.digital.
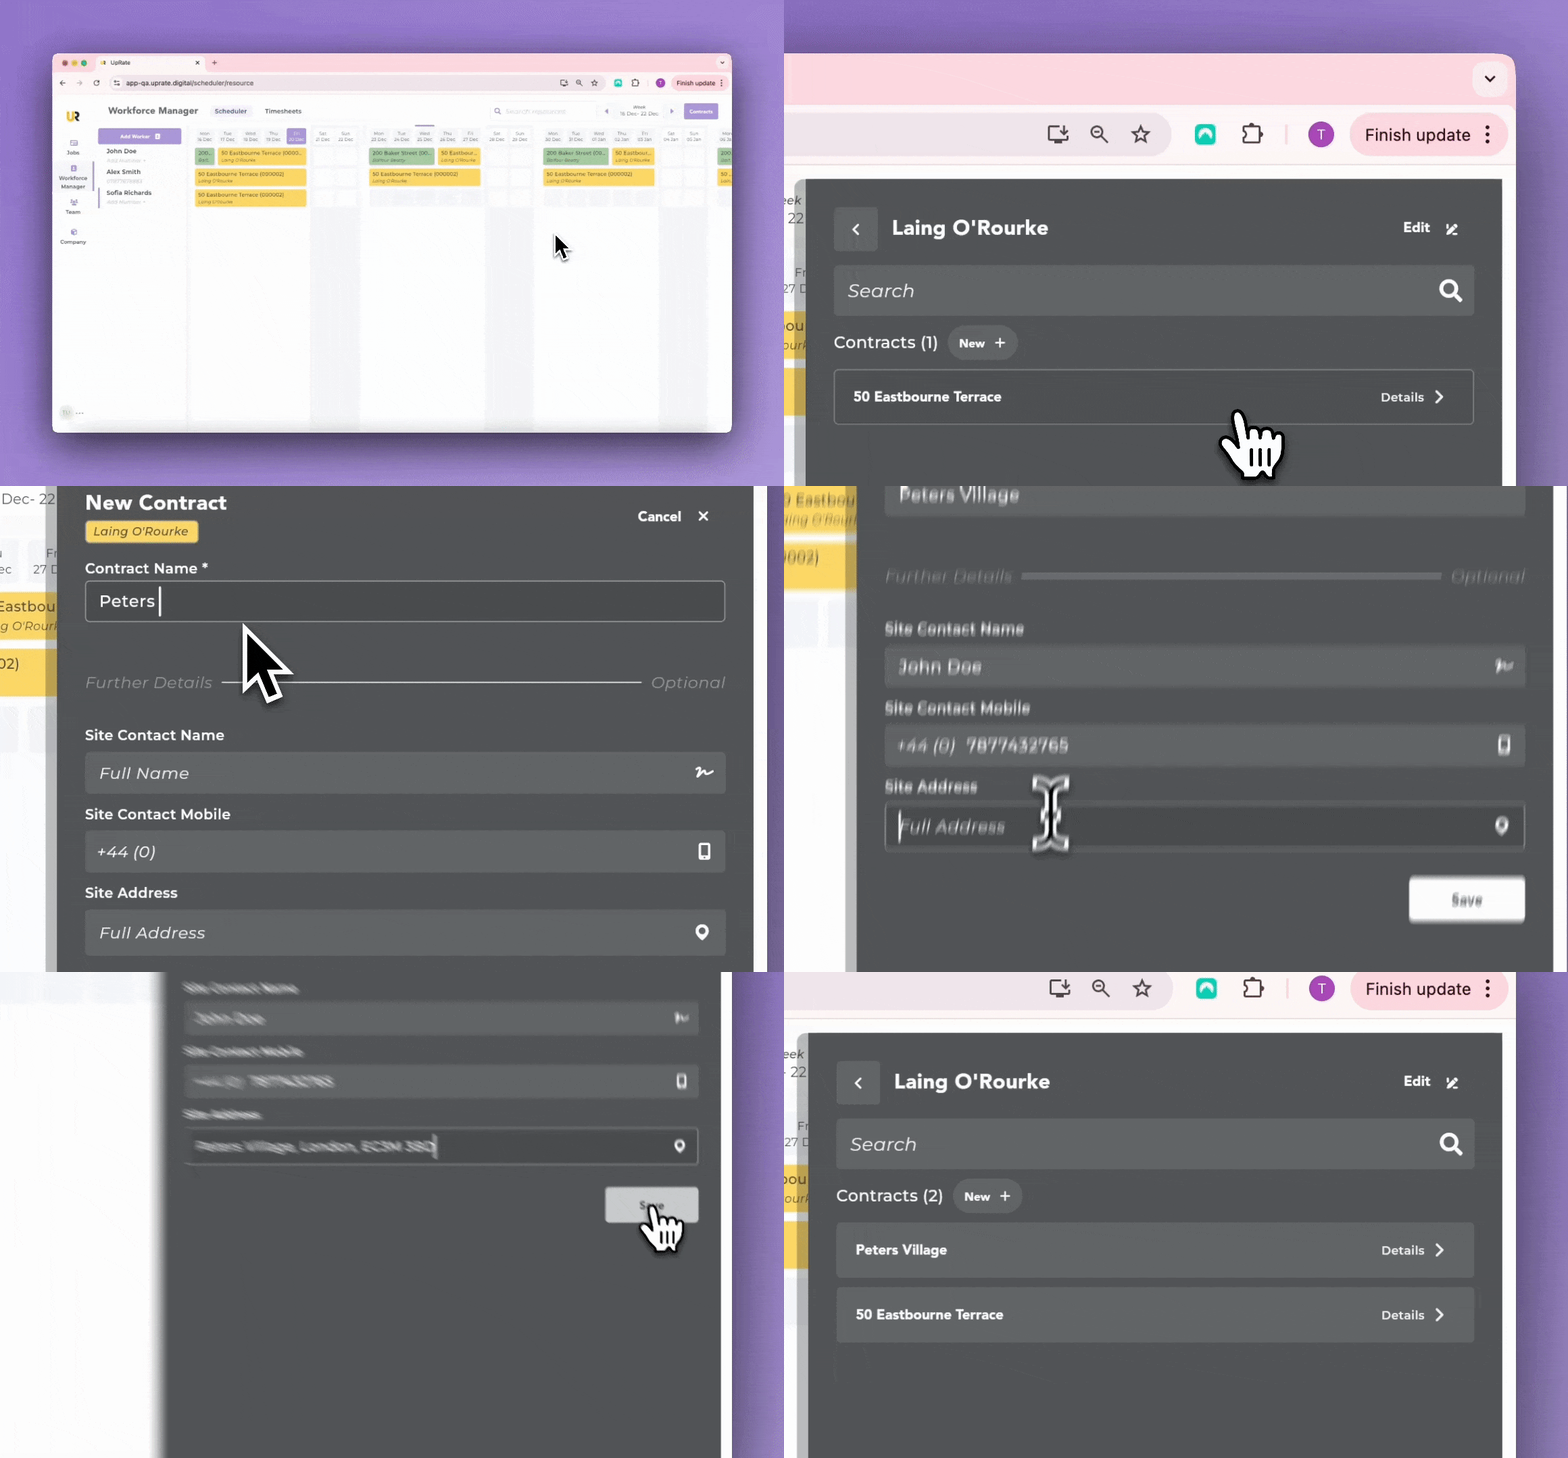
To create a new contract:
Open the scheduler and click the "Contracts" button
Find and click on the customer that you want to create a new contract for
Click the "New" button at the top of the list of contracts
Enter the contract name and, if you want, the site contact details and/or site address
Click the "Save" button
To edit a contract:
Open the scheduler and click the "Contracts" button
Find and click on the relevant customer
Find and click on the relevant contract in the customer's list of contracts
Click the "Edit" button in the top right-hand corner of the page
Change the contract name, site contact details and/or site details as required
Click the "Save" button

Can I delete or archive a contract?
At the moment you can't, but we can do this for you if you email help@uprate.digital.
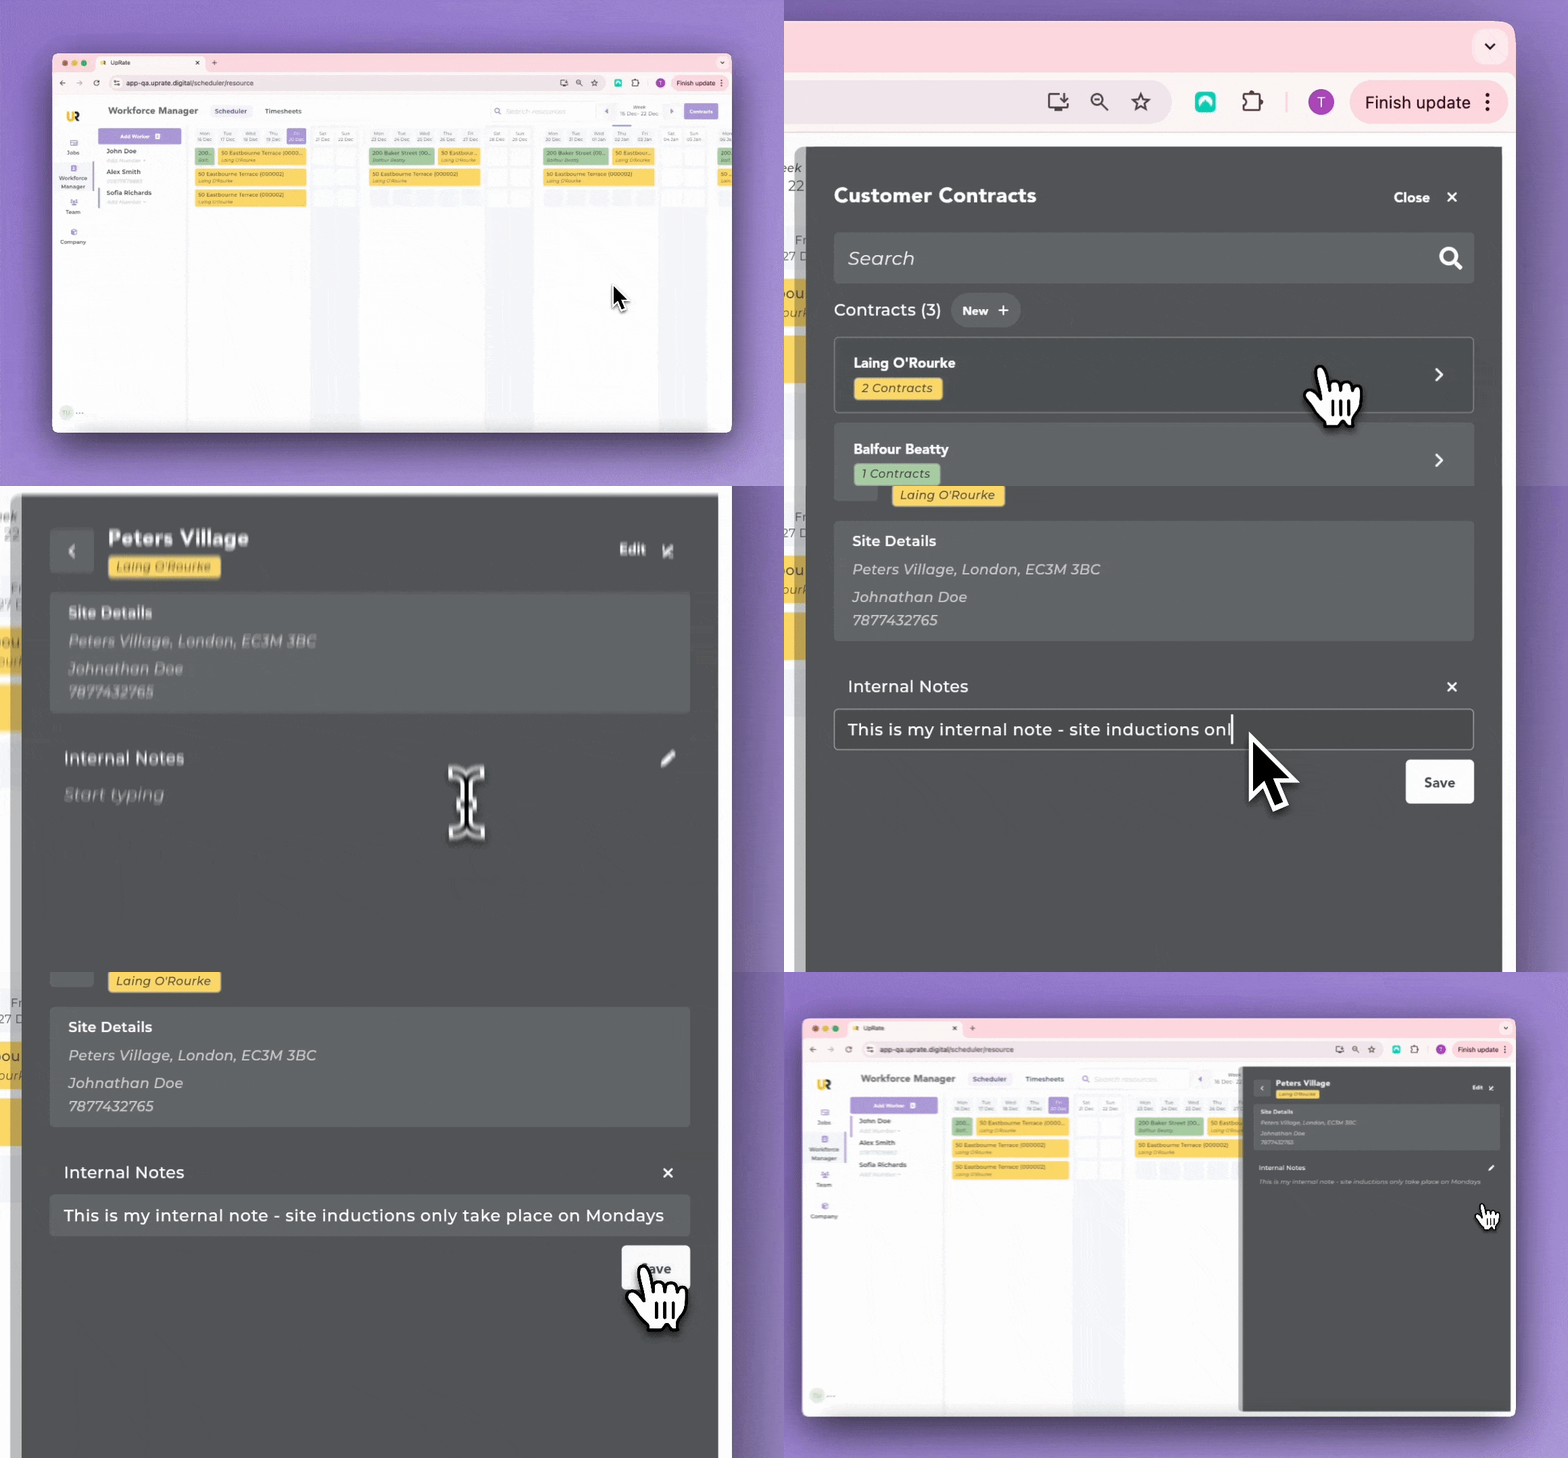
Add an internal note a contract:
Open the scheduler and click the "Contracts" button
Find and click on the relevant customer
Find and click on the relevant contract in the customer's list of contracts
Click on the Internal Notes input
Enter your note text
Click the "Save" button
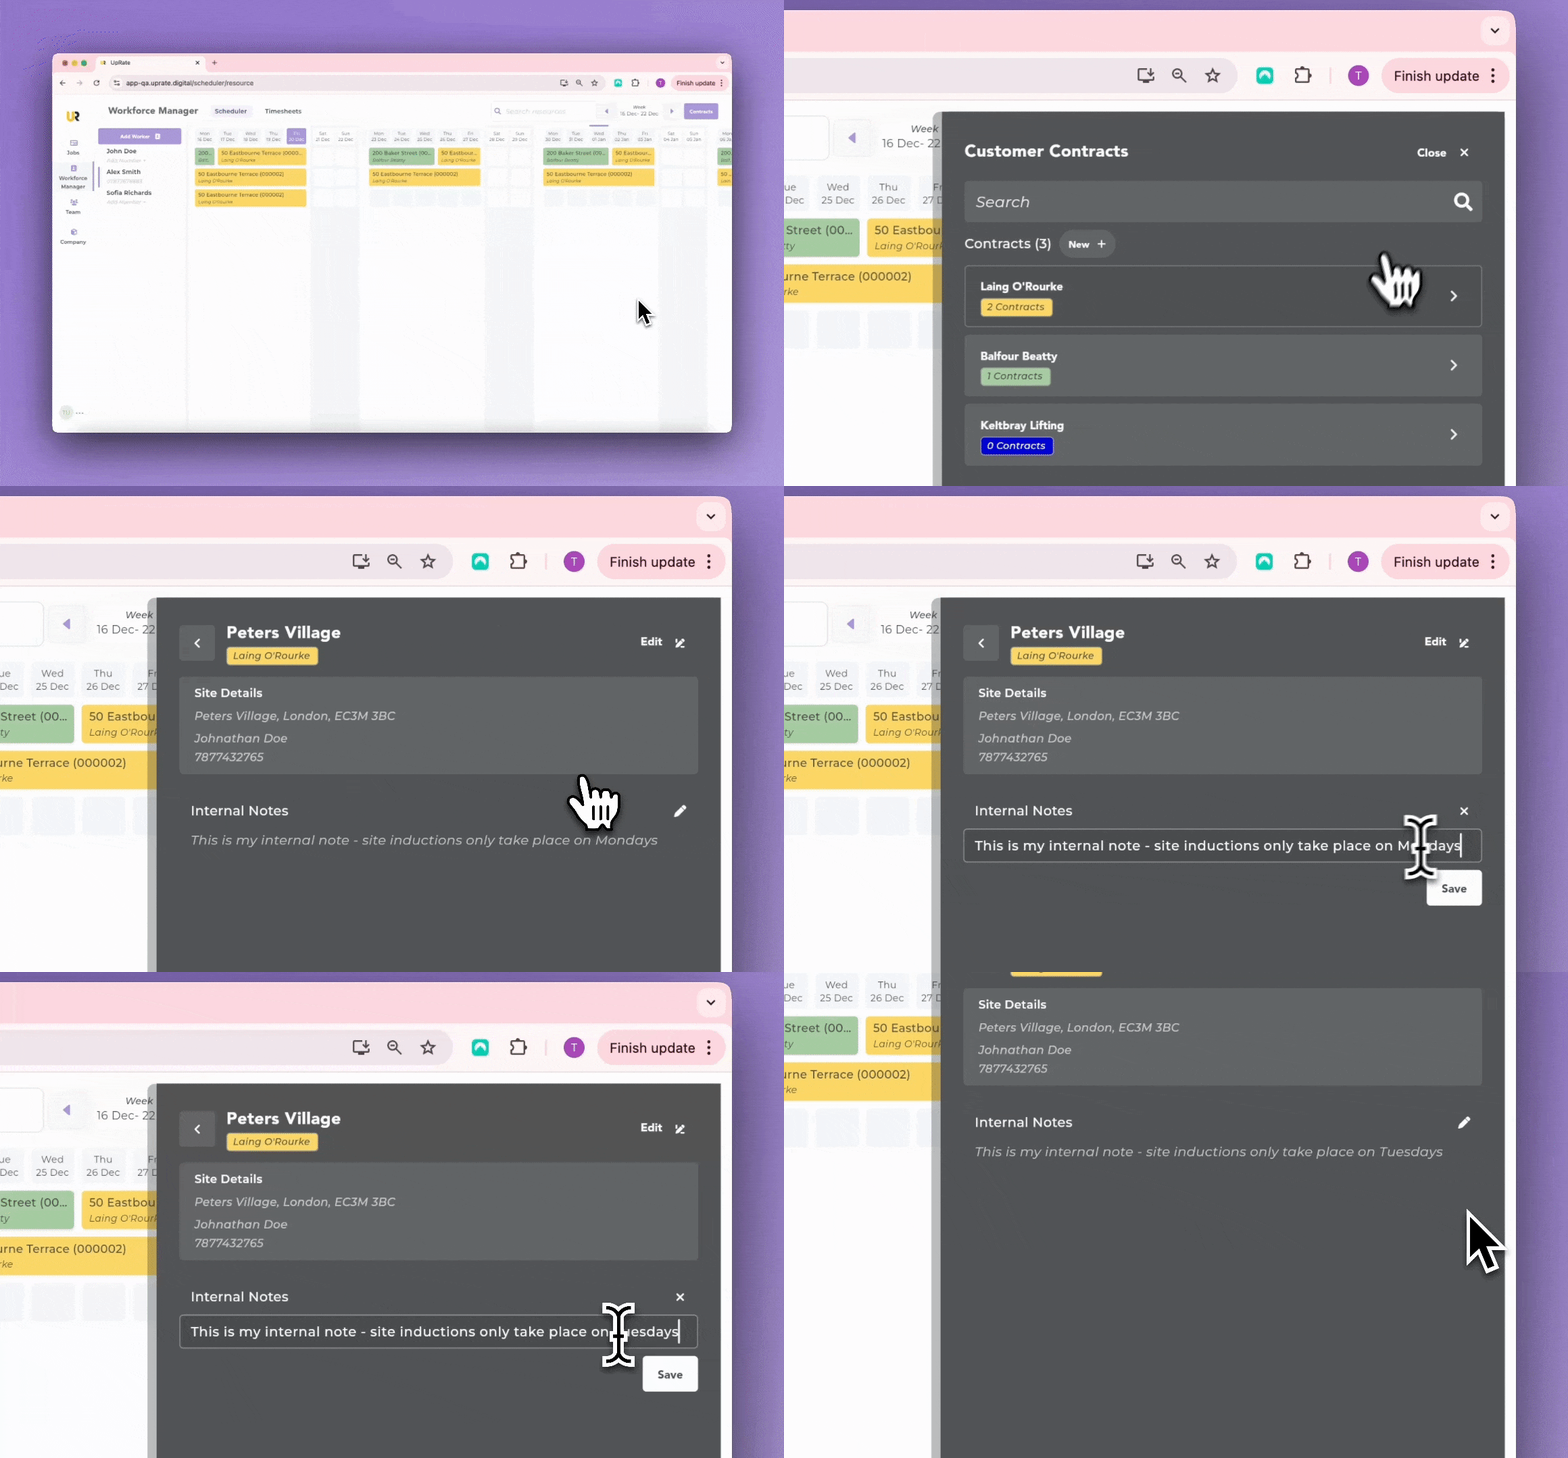
Edit an internal note a contract:
Open the scheduler and click the "Contracts" button
Find and click on the relevant customer
Find and click on the relevant contract in the customer's list of contracts
Click on the Internal Notes text
Enter your updated note text
Click the "Save" button
Schedule Workers
Once you have added your workers and contracts you can begin scheduling. This is done through 'assignments', which are created by assigning workers to your contracts on specific dates.
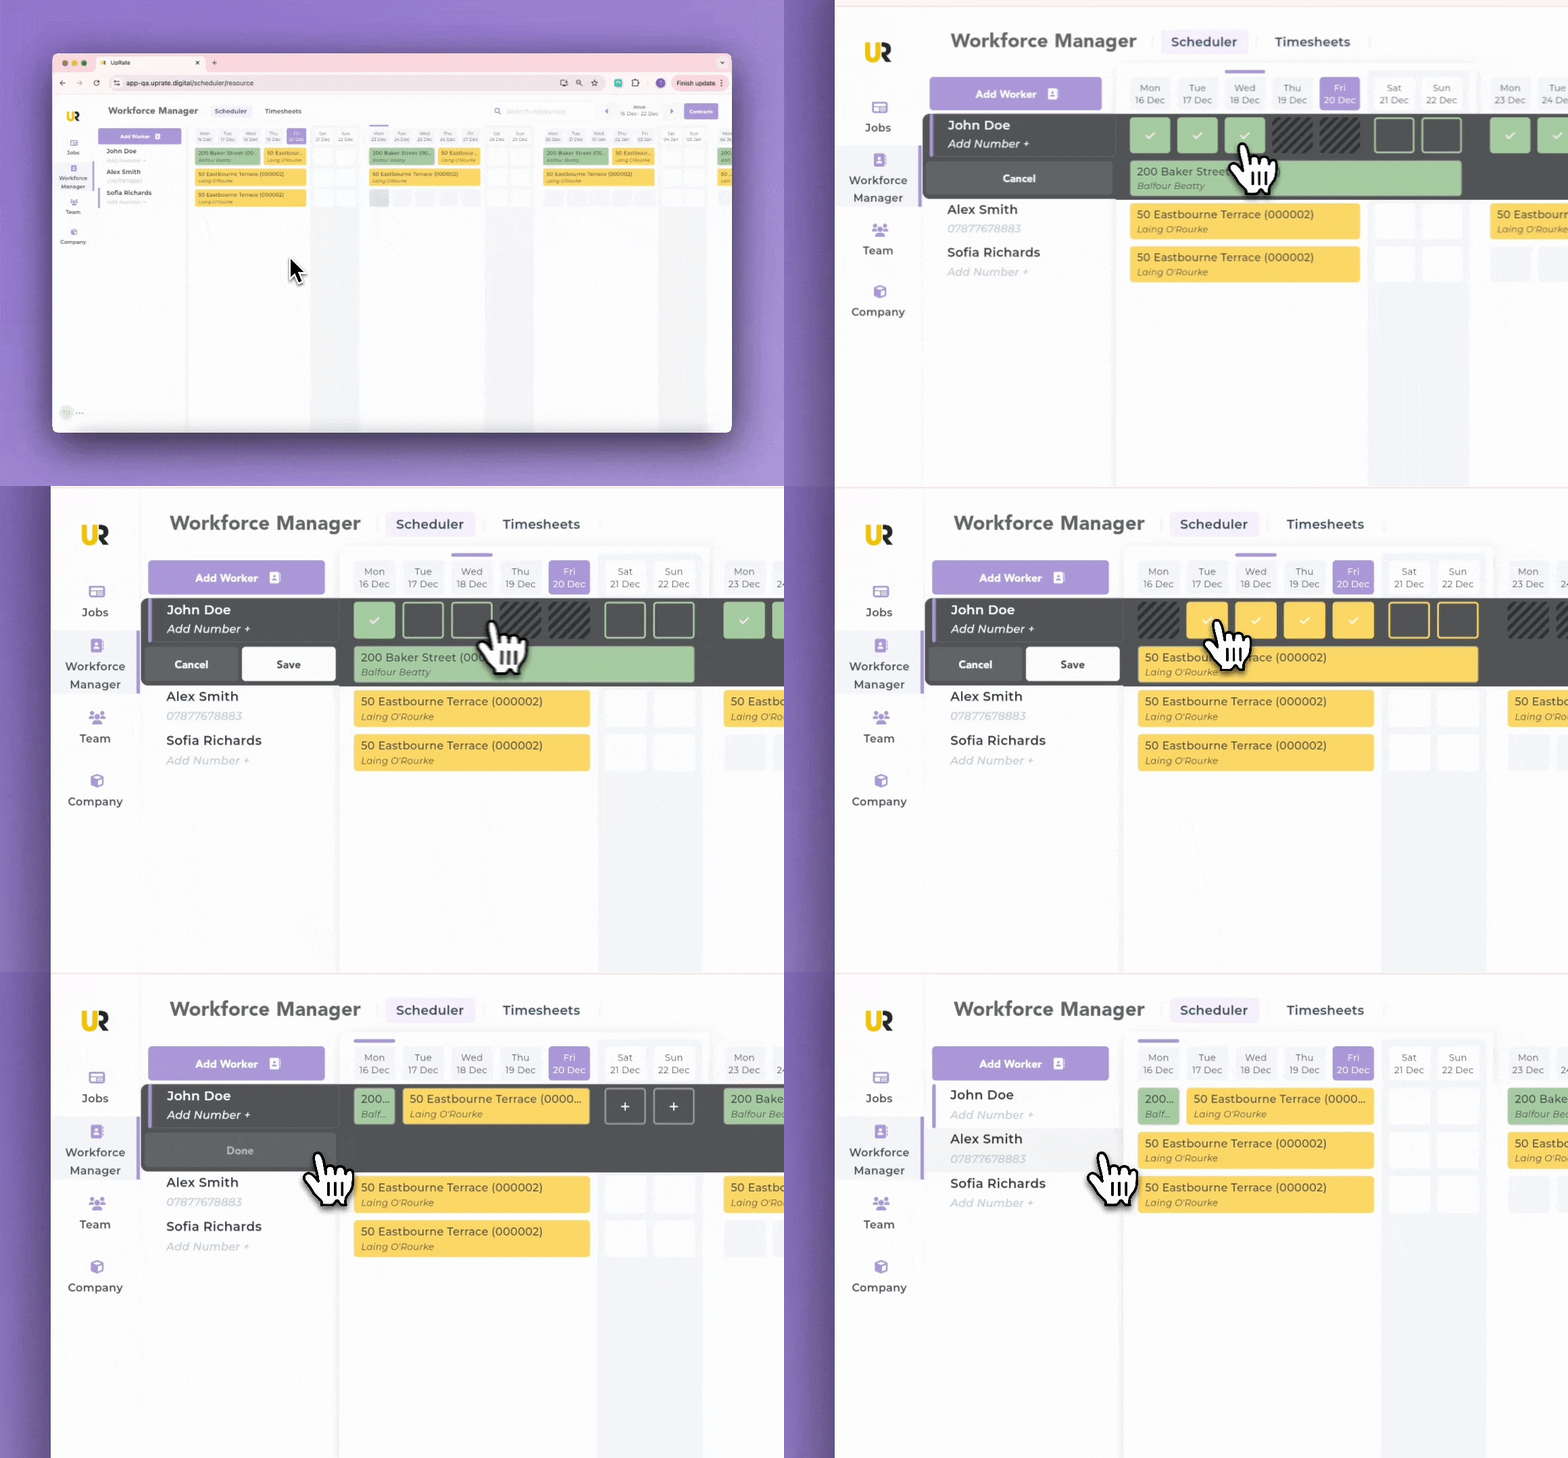
Assign worker to a contract:
Select worker: Open the scheduler and click on the worker you want to assign
Choose dates: Click on the dates you'd like to assign the worker to
Open contracts menu: Click the "Assign to Contract" button to open the Contracts menu
Choose contract: In the Contracts menu, click on the desired customer, then select the appropriate contract from the list
Save assignment: Click "Save" to create the assignment. The scheduler will now show the assignment

Edit an assignment (add/remove days):
Select assignment: Open the scheduler and click on the assignment that you want to edit
Choose dates: Click on the dates that you'd like to assign or unassign
Save changes: Click "Save" to save the changes. The scheduler will now show the updated assignment
Copy assignment details:
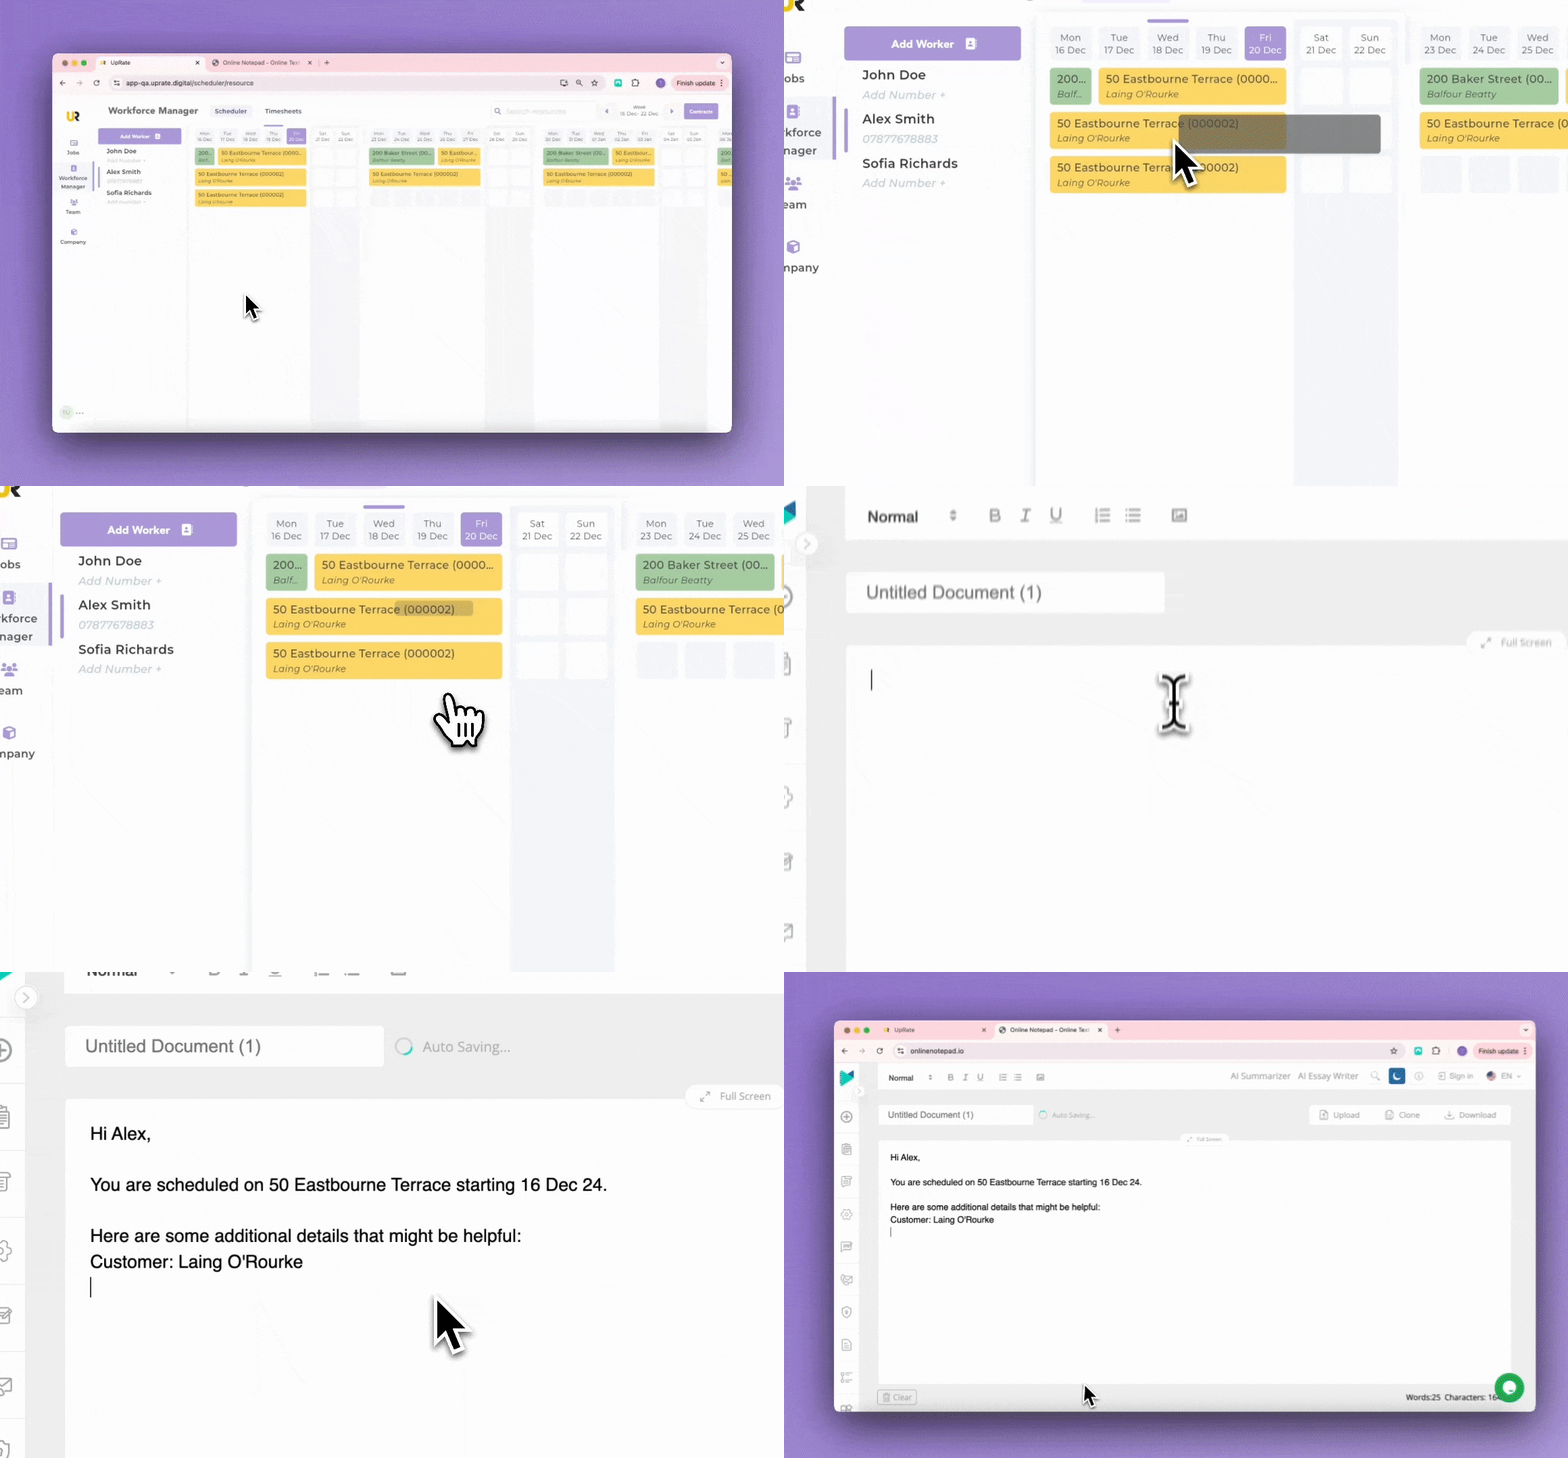
After assigning a worker to a contract, you may want to copy and send the assignment details to the worker. You can instantly do this by:
Opening the scheduler and right-clicking on the assignment that you want to copy the details for
Clicking "Copy Assignment Details" - the assignment details will be automatically copied to your clipboard, meaning you can paste them into an email or text/WhatsApp message to send to the worker
Add Notes
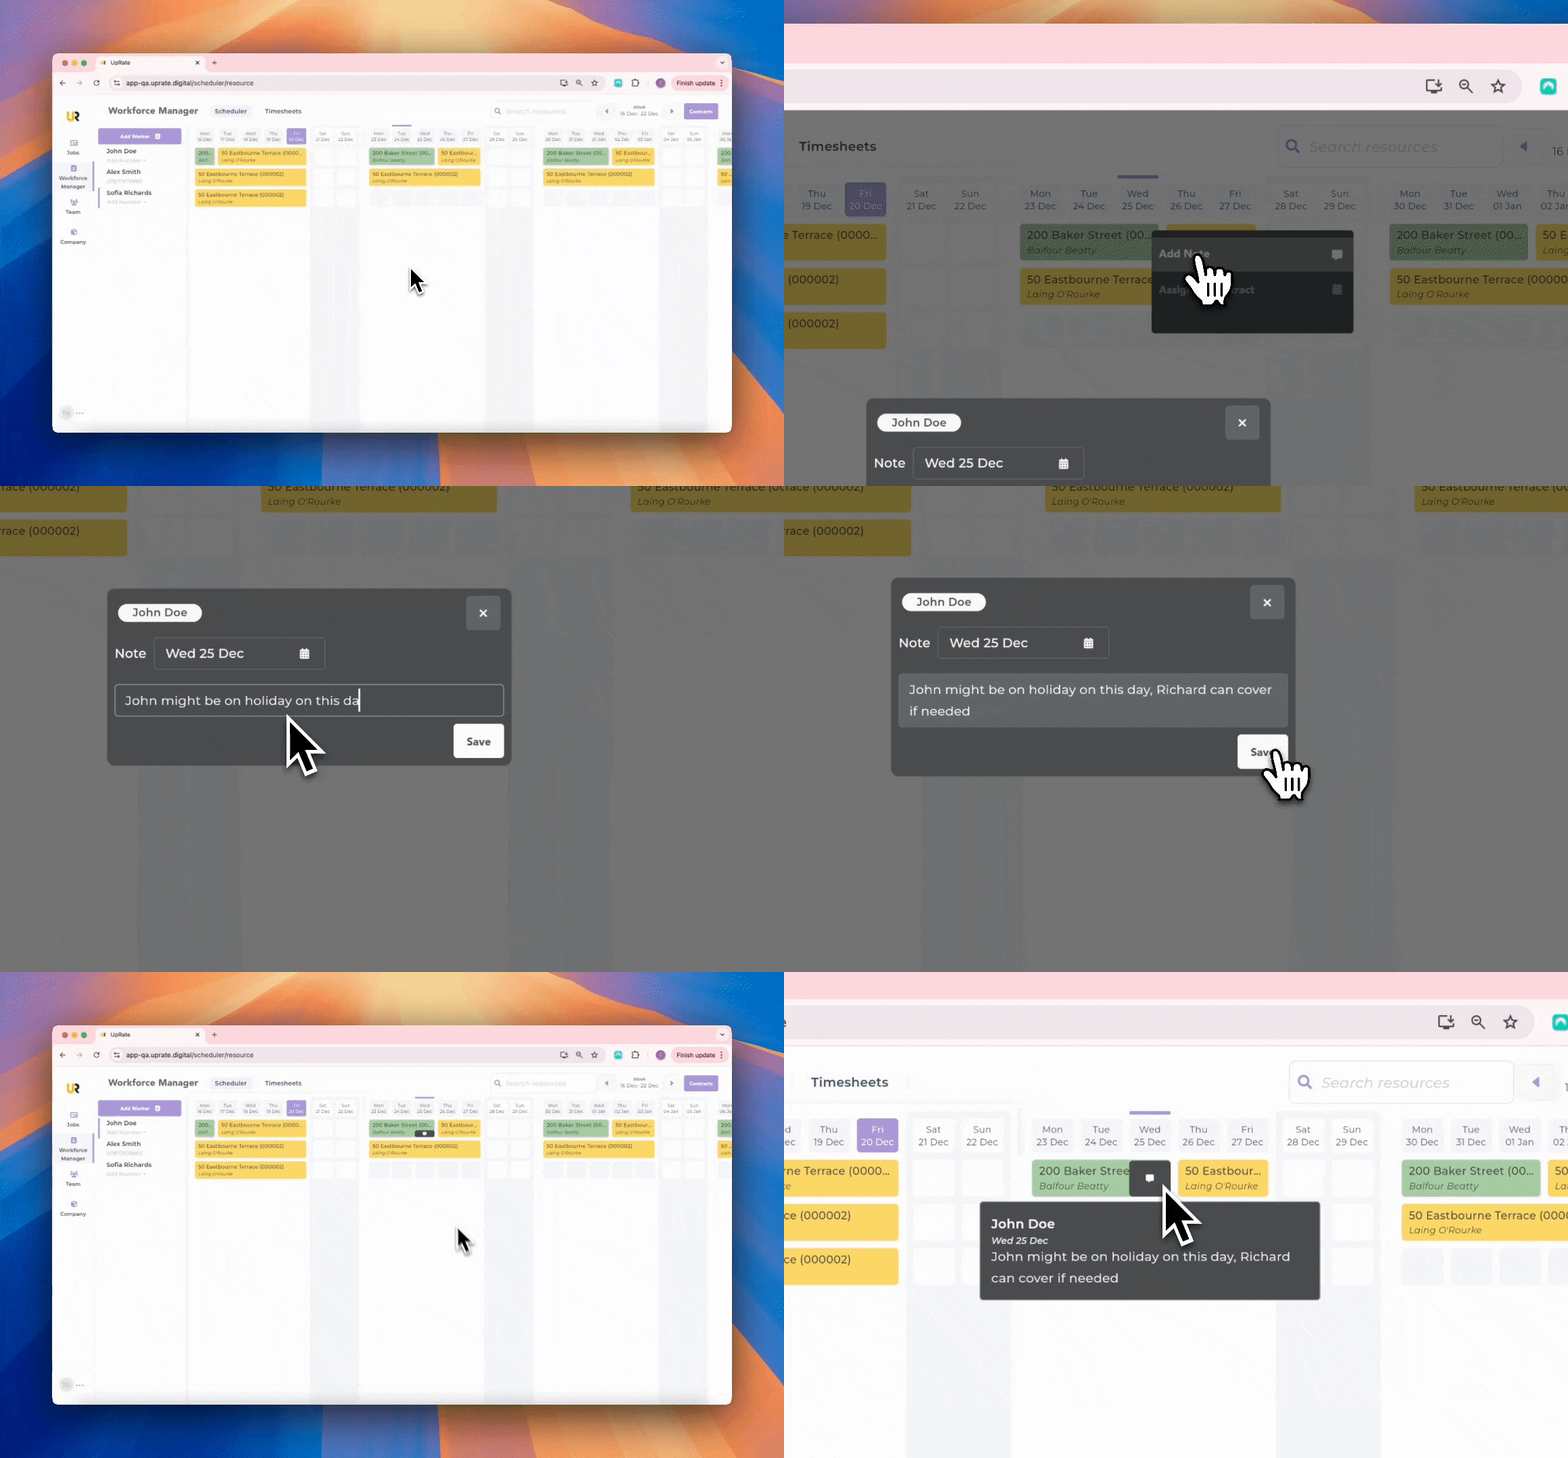
A feature that you might find helpful is the ability to add notes to the scheduler. These can act as reminders or be used to record important information regarding an assignment or worker. You can add a note to any date regardless of whether or not the worker is scheduled onto a contract.
Add a note:
Open the scheduler and find the worker and date that you want to add a note to
Right click on the cell that you want to add a note to (identified in step 1)
Click "Add Note"
Enter your note text in the Comment input
Click the "Save" button - you will see that the note has now been added to the scheduler
Edit a note:
Open the scheduler and click on the note that you want to edit
Click the ellipsis button
Click "Edit"
Make the required changes to the note text
Click "Save"

Delete a note:
Open the scheduler and click on the note that you want to edit
Click "Delete" - you will see that the note no longer shows on the scheduler


